
Reusable Custom Web Components coded in Vanilla JavaScript
With Custom Elements, as web developers, we can create new HTML tags, but more important, we can reduce the number of lines to code and we can add reactivity to this components altogether.
Why are Custom Web Components so important?
Because they let us move aside from HTML template boundaries and put our main logic into the JavaScript language scope.

Here’s a very simple example of a multi-counter application.
This code creates a reusable Button component. Once you click a button, its declared value increments the state of the counter state property of the Button component.

The Button component displays the current value of the Button counter state, changing its color according to the current counter value, as it goes:

Let's describe this class:
Let's take a detour and first discuss some of the lifecycle methods of custom elements. You can use the following lifecycle callbacks with custom elements:
Let's add the necessary callbacks to "MyButton" class:
Now, we only need to tell the DOM to use our custom component:
Every time a custom button is clicked, we gather the current counter value and increment it by one.
As a result of this operation, we update the "counter" attribute with the new value.
The "attributeChangedCallback" function will be executed as a result of this update operation.
You can check out this example live here: Reusable Web Components in Vanilla JavaScript
Why are Custom Web Components so important?
Because they let us move aside from HTML template boundaries and put our main logic into the JavaScript language scope.

A VERY SIMPLE EXAMPLE
Here’s a very simple example of a multi-counter application.
This code creates a reusable Button component. Once you click a button, its declared value increments the state of the counter state property of the Button component.
The Button component displays the current value of the Button counter state, changing its color according to the current counter value, as it goes:
- Red (between 0 and 3)
- Yellow (between 4 and 6)
- Green (between 7 and 10)
- Black (greater than 10)

HTML Markup
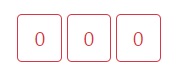
The only HTML markup we need:
  <div id="buttons">
   <my-button counter="0"></my-button>
   <my-button counter="0"></my-button>
   <my-button counter="0"></my-button>
  </div>
Defining a Custom Element
For creating a Custom element, we first have to declare a class for the custom element that defines how the element will behave. This class needs to extend the HTMLElement class.Let's describe this class:
class MyButton extends HTMLElement {
 constructor() {
 super();
 this.addEventListener('click', e => {
    var value = this.btnAction(this.getAttribute('counter'));
    this.setAttribute('counter',value);
  });
}
btnAction(data){
var newval = parseInt(data) ;
newval++;
return newval ;
}Let's take a detour and first discuss some of the lifecycle methods of custom elements. You can use the following lifecycle callbacks with custom elements:
- connectedCallback — Called every time the element is inserted into the DOM.
- disconnectedCallback — Called every time the element is removed from the DOM.
- attributeChangedCallback — The behavior occurs when an attribute of the element is added, removed, updated, or replaced.
Let's add the necessary callbacks to "MyButton" class:
connectedCallback() {
  let btnId = this.getAttribute('counter');
  var template =  buttonTpl(this.getAttribute('counter'));
  this.innerHTML=template ;
}static get observedAttributes() {return ['counter'];
attributeChangedCallback(attr, oldValue, newValue) {
var template = buttonTpl(newValue);
this.innerHTML=template ;argin:auto;
}Now, we only need to tell the DOM to use our custom component:
customElements.define('my-button', MyButton);
Expected behavior
The "connectedCallback" function will be executed when the page is loaded and the component mounted.Every time a custom button is clicked, we gather the current counter value and increment it by one.
As a result of this operation, we update the "counter" attribute with the new value.
The "attributeChangedCallback" function will be executed as a result of this update operation.
Wrapping Up
I hope this article gives you enough information to go and build your own custom components without any dependencies.You can check out this example live here: Reusable Web Components in Vanilla JavaScript
About Daniel Vukasovich


No comments